作品發表區
| 發表作者 | 蘇聯ㄟ | 個人積分 | 13019 |
|---|---|---|---|
| 身份等級 |
|
||
| 作品類別 | 其他 | 發表時間 | 2010.04.19 17:22 |
| 拍攝地點 | 日本蔦 | ||
| 標籤 | 節錄『這樣拍出好風景』一書 | ||
| 評議推薦 |
大型阿生:相當實用且詳細的圖文 awei-750:賞美圖還能兼學習~ |
||
| 微笑照片 72 | 點閱數 14543 | 回應數 24 | 評議推薦 5 | 資深推薦 10 | |||
72


分享:提升暗部細節的修片技巧
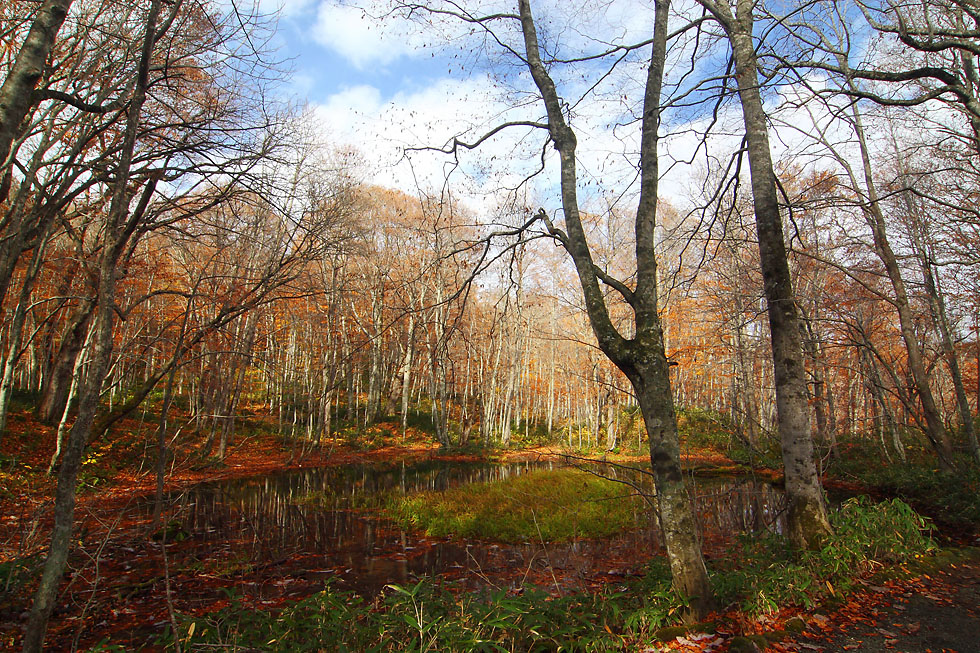

成果 ↗ (注意藍天白雲的明暗度是不變的)
原圖 ↘

提升暗部細節修片技巧
原圖是一幅有反差的風景照,天氣非常好,有藍天及白雲,但地面及樹林卻因反差造成曝光不足,變得非常暗。因此,要如何提升暗部細節,而又不動到天空的亮度,就成了後製時的重要關鍵。
步驟一:以Photoshop 開啟原圖,按 Ctrl+J 可以拷貝一個相同的圖層,底圖為「背景」,及新的「圖層1」。

步驟二:接下來至右下角的圖層浮動視窗中點選「色版」,並以滑鼠分別點按「紅、綠、藍」各別的色版,比較出哪一個色版的圖,黑白對比度最高,此圖中發現「藍」色版時的黑白對比度最高,拖曳「藍」色版至「建立新色版」中,複製一個「藍 拷貝」色版。

步驟三:按住「Ctrl」鍵,然後在「藍 拷貝」色版上按一下滑鼠左鍵,以載入「藍 拷貝」色版的選取範圍。

步驟四:再點回「RGB」色版,並至上方功能表列的「選取」/「反轉」按一下滑鼠左鍵。

步驟五:接下來至右下角的圖層浮動視窗中點選「圖層」,再點選「設定圖層的混合模式」的「濾色」。這時會發現整張照片都變亮了。

步驟六:再點按一下「增加向量圖遮色片」按鈕,會發現只有地面及樹林等暗部加亮了,細節也顯現出來了;而天空還原至原來的亮度。

步驟七:如果覺得暗部還不夠亮,可將「圖層1」再拷貝一次(Ctrl+J),或直接將「圖層1」拖曳至下方的「建立新圖層」按鈕。最後在上面的圖層按右鍵,選「合併可見圖層」,即可另存新檔。

TIPS:
複製色版時,需選擇反差較大的色版來複製。RGB色彩模式的影像中,「紅、綠、藍」色版的反差有時會隨著原始影像的色調而有所不同;對明暗差異大的影像來說,本操作教學比較適用。
感謝您的點閱,更詳盡內容,歡迎光臨:蘇聯ㄟ blog
近期精彩課程:
2010/4/25 [課程]-DCView100金牌講師的風景攝影全日班
新書簽書會:
2010/4/24(六) PM 7:00-8:30 台北微風廣場5樓紀伊國屋書店
歡迎您的參加,萬分感謝~~